At Last, The Secret To Migrating Home Assistant To / From Docker!
Learn the step-by-step process of migrating Home Assistant to and from Docker with this comprehensive guide. Discover how to move your Home Assistant instance between Docker and Raspberry Pi, ensuring smooth transitions without losing your configurations.

Due to the scarcity of Raspberry Pis, I believed this post would be beneficial to the community. Using this strategy, you may run a docker instance on any computer you now have, and when RPi's become more widely accessible, you can move the docker instance to the RPi; however, I want to convert my RPi instance to a docker instance.
Unfortunately, no hardware in IT or IoT lasts forever, and you will be pushed to update to new gear or replace obsolete / malfunctioning equipment at some point. Purchasing new hardware is often more cost effective in the long term than attempting to fix or update your present hardware.
Furthermore, installing the most recent software on your new hardware is more efficient than moving or maintaining existing software. However, as previously stated, "I'm lazy," and I want to keep my efforts in this area to a minimum.
However, keep in mind that failing to regularly update software might result in a lengthier and often more expensive upgrading process.
Requirements
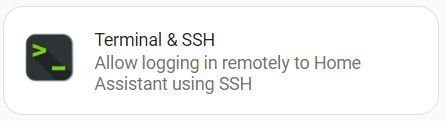
As with most things in life, there are generally numerous approaches. However, the process of migrating from bare metal device to bare metal device differs from what I am going to demonstrate, which is particular to migrating a HA instance to/from Docker. We'll need to install a few applications to complete our move. The following tools must be installed on our Raspberry Pi: file editor and the "terminal & SSH" add-ons.

RPi to Docker
Now that we have these tools, let's go over how to migrate our RPi instance to Docker. I'm hoping that one day they will include the option to use backups in the container version of Home Assistant, but for now, this is the best we can do.
If you use file editor, you may download your configs one at a time, or we can use a tar command in the terminal to compress everything into a single file that we can download and transfer to our Docker config folder, and then extract.
To complete, run the following command from the terminal:
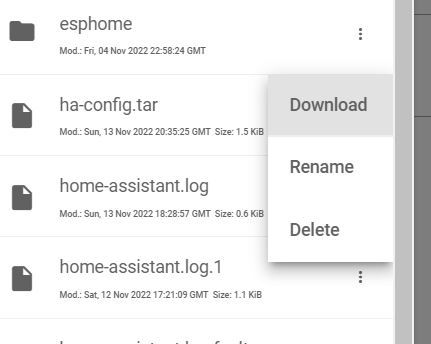
tar -cf ha-config.tar config/The c in the "-cf" flag informs tar that we are generating a new archive file, and the f indicates that we are giving it a name, in this instance ha-config.tar, and it will finally compress everything in the config directory on our raspberry pi. Now, in the file editor, we can simply download a single file, but first we will move it to where we can actually download it from with this command;
mv ha-config.tar /config/Now we can use the file editor to download the tar file we just made and moved.
We can now transfer the tar file to our Docker config directory and extract it using;
tar -xf ha-config.tarBut before we restart the container, we must confirm that the settings in our configuration.yaml file are supported by the container version of Home Assistant, and if not, we must disable them by commenting them out with the # symbol in front of each setting or completely deleting it from the configuration. Now, we may now restart the container.
We have now successfully transferred our instance. Just keep in mind that add-on integrations do not operate the same way in the container version as they do in other versions. If you want to learn how to get them to function on your Docker instance, watch this video on running Home Assistant in Docker!
Docker to RPi
We just went through the RPi to Docker migration process; to migrate Docker to RPi, simply reverse the process. Tar everything in the Docker-mapped config folder and copy the tar file to our RPi instance's config folder.
To finish the copy successfully, we must first stop our HA container so that we do not corrupt the database, and then copy the folder contents from Docker to the RPi. After we've copied it, we can execute the command from the terminal;
ha core rebuildI'm not sure whether this is necessary, but if we've corrupted anything, that command will attempt to fix any corruptions. You will have successfully moved your HA Container instance to your RPi, after the rebuild is complete you can start installing any add-on integrations back into our instance. You must be cautious of some of the settings in your configuration yaml; as previously stated, some of the changes will not be supported by the RPi instance.
I hope that this was helpful in some way, and I'd love to hear if anyone has a better way to accomplish this or if you're having problems with the process. I am soliciting your feedback here because I appreciate those who actively contribute to the comments section and assist others with their issues.