Home Assistant & Zigbee: How to Set It Up and Put It to Use, and Why You Should Do the Same! Part 2 - Zigbee Bridge Pro

In this second article, I will be continuing my discussion of all things Zigbee, by detailing the conversion of a Zigbee Bridge Pro for use with the ZHA integration. In the first article, I discussed the conversion of a Zigbee Bridge for use with the ZHA integration.
This process is going to be very similar but different, so I am sorry if you are seeing repeat content, as I am not sure how to split these articles up and provide the relevant information without making you read all 3, and why should you if the other ones don’t apply to you?
Zigbee has gained popularity in the home automation industry in recent years due to its popularity among hobbyists and its integration with hardware from many manufacturers, and software like Home Assistant, which makes it an ideal candidate in my opinion. Also, a smart home system should be able to expand over time, because you never know when you'll need something else.
So what are you waiting for? Let's build a smart home!
Requirements
Aside from Home Assistant, a Zigbee device, and the Zigbee Bridge Pro, we will require a few additional items to complete this;
- FTDI Serial-to-USB Converter 3.3V capable
- USB Extension Cable
- Soldering Iron - A TS80P is my recommendation, it is small, compact and portable, but you can always get it done with a cheaper soldering iron.
- DuPont cables or Breadboard wire (as an FYI, I will be using DuPont cables)
- PIN Headers
- Tasmota32 binary for ZB Bridge Pro
Background
The Zigbee Device Compatibility Repository provided by the website BlakAdder has everything you may possibly require and more. But first, let's review some basic terminology so that everyone is on the same page.
There are three fundamental components of Zigbee mesh networks: end devices, routers, and coordinators; however, these components can sometimes perform multiple functions.
- Coordinators, which can also route data to end devices and other routers, are the initial component required to establish a Zigbee mesh network. After a coordinator has been installed, further devices can be added to the network.
- The next device is a router, which may offer end-device information, route traffic, and aid with mesh network extension by enabling the coordinator to route data across newly created links.
- End devices are the final devices, which often do not route data or contribute to the extension of a mesh network. The majority of Zigbee devices consist of end devices such as sensors, plug, switches and some home appliances.
The total number of Zigbee devices on your network is dependent on the hardware and software of your coordinator as well as the number of routers in your network.
Our Zigbee Bridge Pro will be configured as a coordinator, responsible for managing the Zigbee network and ensuring that all devices can communicate with one another. Coordinators play an important role in network security since they are responsible for transmitting security keys to other network devices. Once our Zigbee coordinator is operational, we will begin integrating an end device onto the network.
Flashing
We will begin with flashing, followed by Home Assistant integration and pairing. Just a brief note before we begin. Unlike the Dongle Plus, which must be connected to your RPi or PC, these bridges can be installed anywhere in your home, regardless of how your Home Assistant instance is being operated, and only require power.
Okay, the Tasmota32 binary will be flashed into the device using the FTDI Serial-to-USB converter and the ESPHome Web Installer. If you are unfamiliar with the word "flashing," it refers to the process of uploading or updating the software currently loaded on the device.
Download the latest firmware for the ZB Bridge Pro from Tasmota's GitHub page; at the time of writing, it was tasmota32-zbbrdgpro.factory.bin v12.2. This image has everything we will require. As always, there are numerous methods to flash this device; I'm only demonstrating a simple method that does not involve additional software being installed.
***WARNING / DISCLAIMER***
By following my guide, I offer no express or implied warranty of any sort. I will also not be held liable for any product defects or damages to you or your equipment resulting from the use of this guide.
You could be severely injured or be killed if you flash a device plugged into mains-level voltage; if you don't know what you're doing, stop and seek assistance from someone who does.
You've been warned.
To reach the screws, we will need to disassemble this device by removing the four rubber feet. Now remove the PCB and, if desired, solder a 5-pin header. Connect either breadboard wires or Dupont cables to the following pins:
The Bridge must be in programming mode prior to flashing the Tasmota binary. This is performed by connecting GPIO0 to GND while the device is booting, as seen in the diagram above. It is acceptable to leave the ground connected throughout this flash, but we must detach it before rebooting the device. Once all the wires are connected as shown, we can connect the FTDI to our USB extension cable, then to the computer, and load the ESPHome Web Installer.
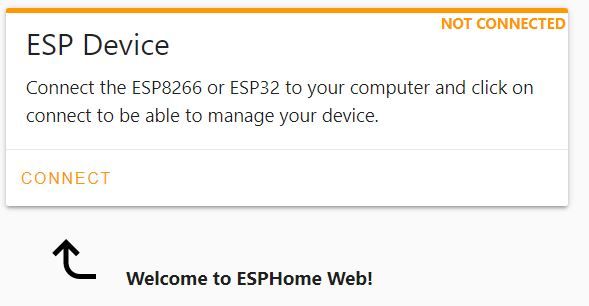
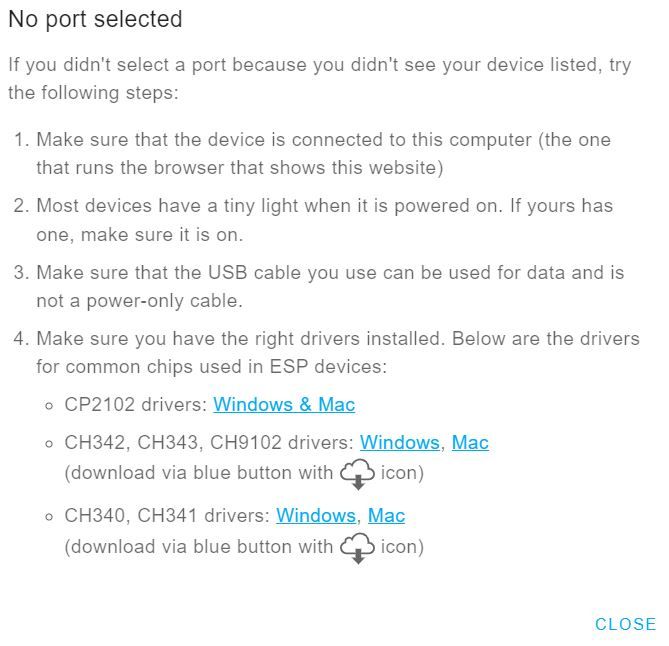
Now, click on the “Connect” button, it will load a pop up window where you will have to select your device from the list and again select connect.
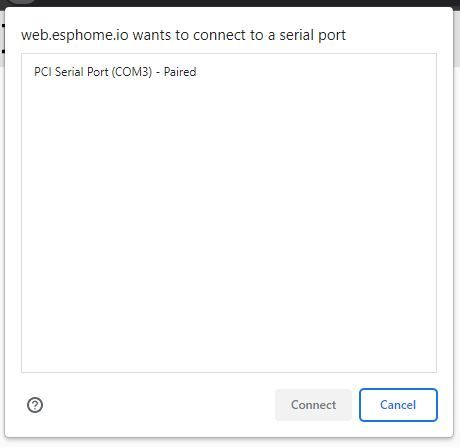
If you do not see your device or you get an error, You may not have the proper drivers installed, which are linked in the new pop-up window, or your device is not working.
Once you are able to connect to your device, you will be presented with a screen like this;
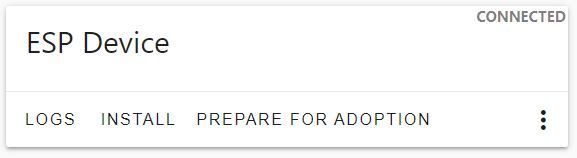
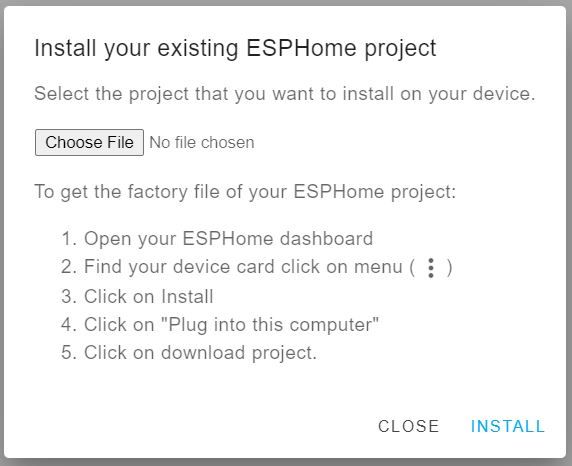
Now all you have to do is click the “Install” option and then click on “Choose File”, it will open yet another pop-up window where you can navigate to the Tasmota32 binary you downloaded and select it, after click install.
Allow the installer to do its work; do not close the window, and avoid disconnecting your device at this time, as you may cause it damage. This will require some time. When it is complete, you will see a success message. Just click next.
Now that it has been flashed, you can detach it from the USB and the FTDI in order to power it down. To power the bridge, we will simply connect a USB cable to its port. When you do, you should see a new WiFi access point, connect to it and it should automatically load a webpage, if it does not navigate to the default IP address, 192.168.4.1, where you should see a WiFi access list. Simply select the network you wish to connect to, enter your credentials, and then click save.
After successfully connecting your WiFi, it will try to redirect to a new page, also it will display the new IP address that was assigned to it. However, depending on how you initially connected to the captive portal, you may need to reconnect to your WiFi and then navigate to the new IP address to view the Tasmota captive portal and menu options. Congratulations! You have successfully flashed the Tasmota software onto your Zigbee Bridge Pro.
Now we will configure our new device. I have been using this GitHub discussion, as my guide to complete this process, there are many great contributions by a lot of people in this thread. Now we have to flash the device with the coordinator software, and to do that we are going to use the berry scripting console and run the following command:
import sonoff_zb_pro_flasher as cc
cc.load("SonoffZBPro_coord_20220219.hex")
cc.check()
This initial step just validates the firmware and ensures that the BSL GPIO is set to DIO_8. The firmware has not yet been flashed, and you should see the following after roughly 10 seconds:
Verification of HEX file OKNow we can flash the firmware to the chip with this command:
cc.flash()The flashing procedure can last up to 5 minutes, rendering your device inoperable. Do not unplug or restart the bridge at this time, as you will have to re-flash it and begin over. When completed, the logs should show the following:
18:32:20.208 FLH: cc2652_flasher rx=23 tx=19 rst=15 bsl=22
18:32:20.228 FLH: Flashing started (takes 5 minutes during which Tasmota is unresponsive)
18:36:38.542 FLH: Flashing completed: OK
18:36:38.652 FLH: Flash crc32 0x000000 - 0x2FFFF = bytes('1598929A')
Now, simply restart the bridge, which should restart normally and display the recently installed firmware for your radio as "Zigbee: ZNP v2.7.1.20220219."
Finally, we'll configure a rule to convert it to a TCPBridge and restart it whenever the device reboots. The rule's port of 8888 and device name can be adjusted to whatever you like. Navigate to Consoles → Console, and execute the following command: (Note this is not the berry console)
backlog rule1 on system#boot do TCPStart 8888 endon ; rule1 1 ; template {"NAME":"Sonoff Zigbee Pro","GPIO":[0,0,576,0,480,0,0,0,0,1,1,5792,0,0,0,5472,0,320,5793,5504,0,640,608,32,0,0,0,0,0,1,0,0,0,0,0,0],"FLAG":0,"BASE":1} ; module 0And for one last time, restart the bridge!
Integrating into Home Assistant
We can now navigate to our Home Assistant instance and start integrating our new toy. To do so, navigate to Settings → Devices & Services and then click the Add Integration icon in the bottom left corner. We will search for ZHA and click on it, then in the next box, select "Enter Manually" for serial port and "ZNP" from the selection for radio type. In the Serial device path, type socket://[ZBBridgePro]:8888. Substituting [ZBBridgePro] with its actual IP address, and changing the port of 8888 if you changed it when we flashed this device, and finally setting the port speed to "115200" and leaving the hardware flow control on software and then clicking submit. Now just select to use the radios network settings and you should receive a notification confirming that Home Assistant successfully added the new device.
Pairing Devices
We need our coordinator to look for devices to pair in order to add them to your network. This can be accomplished in a variety of ways, including calling the "zha.permit" service in the developer tools, creating an automation that calls this service by a switch on your dashboard, or navigating to the ZHA integration from "Devices and Services" and selecting configure, then clicking the add device button in the bottom-right corner. Follow the instructions on your ZigBee device to put it into pairing mode, and it should now begin the negotiation process with your coordinator.
That's all there is to it. Have fun connecting all of your ZigBee devices right now! Good luck and happy connecting!
Binary Tech Labs
YouTube content creator that provides tech tutorials and reviews on Home Assistant, IoT devices, Raspberry Pi and other Single Board Computers