USB Serial Device Passthrough to Docker Container // Home Assistant
Learn how to pass a USB dongle through to a Docker container in this step-by-step guide. Whether you're using Home Assistant or another system, this guide simplifies the process of configuring USB device access in Docker, especially for Linux users. Discover practical tips for seamless integration
The most common question I hear from individuals who are new to Home Assistant and Docker is, "How can I get my Docker container to see my USB dongle?" For me, the answer is simple: just send it through to the container. While this functionality is natively supported in Linux, I am not aware of any support for Mac or Windows. I know there are ways to passthrough a USB storage device to Docker in Windows and Mac, but that's it.
I'd appreciate it if someone could correct me and teach me how to transfer a USB dongle to a container on MAC or Windows, so that I could provide a better solution for everyone.
So, in order to send the USB device id or serial address to our docker container, we must first find it. This is entirely done on the host machine, so you'll need terminal access however you get it, whether by SSH or a keyboard and mouse. For most users, the best solution is to leave the USB device unplugged for the time being and run either of these commands;
ls /dev | grep tty
or
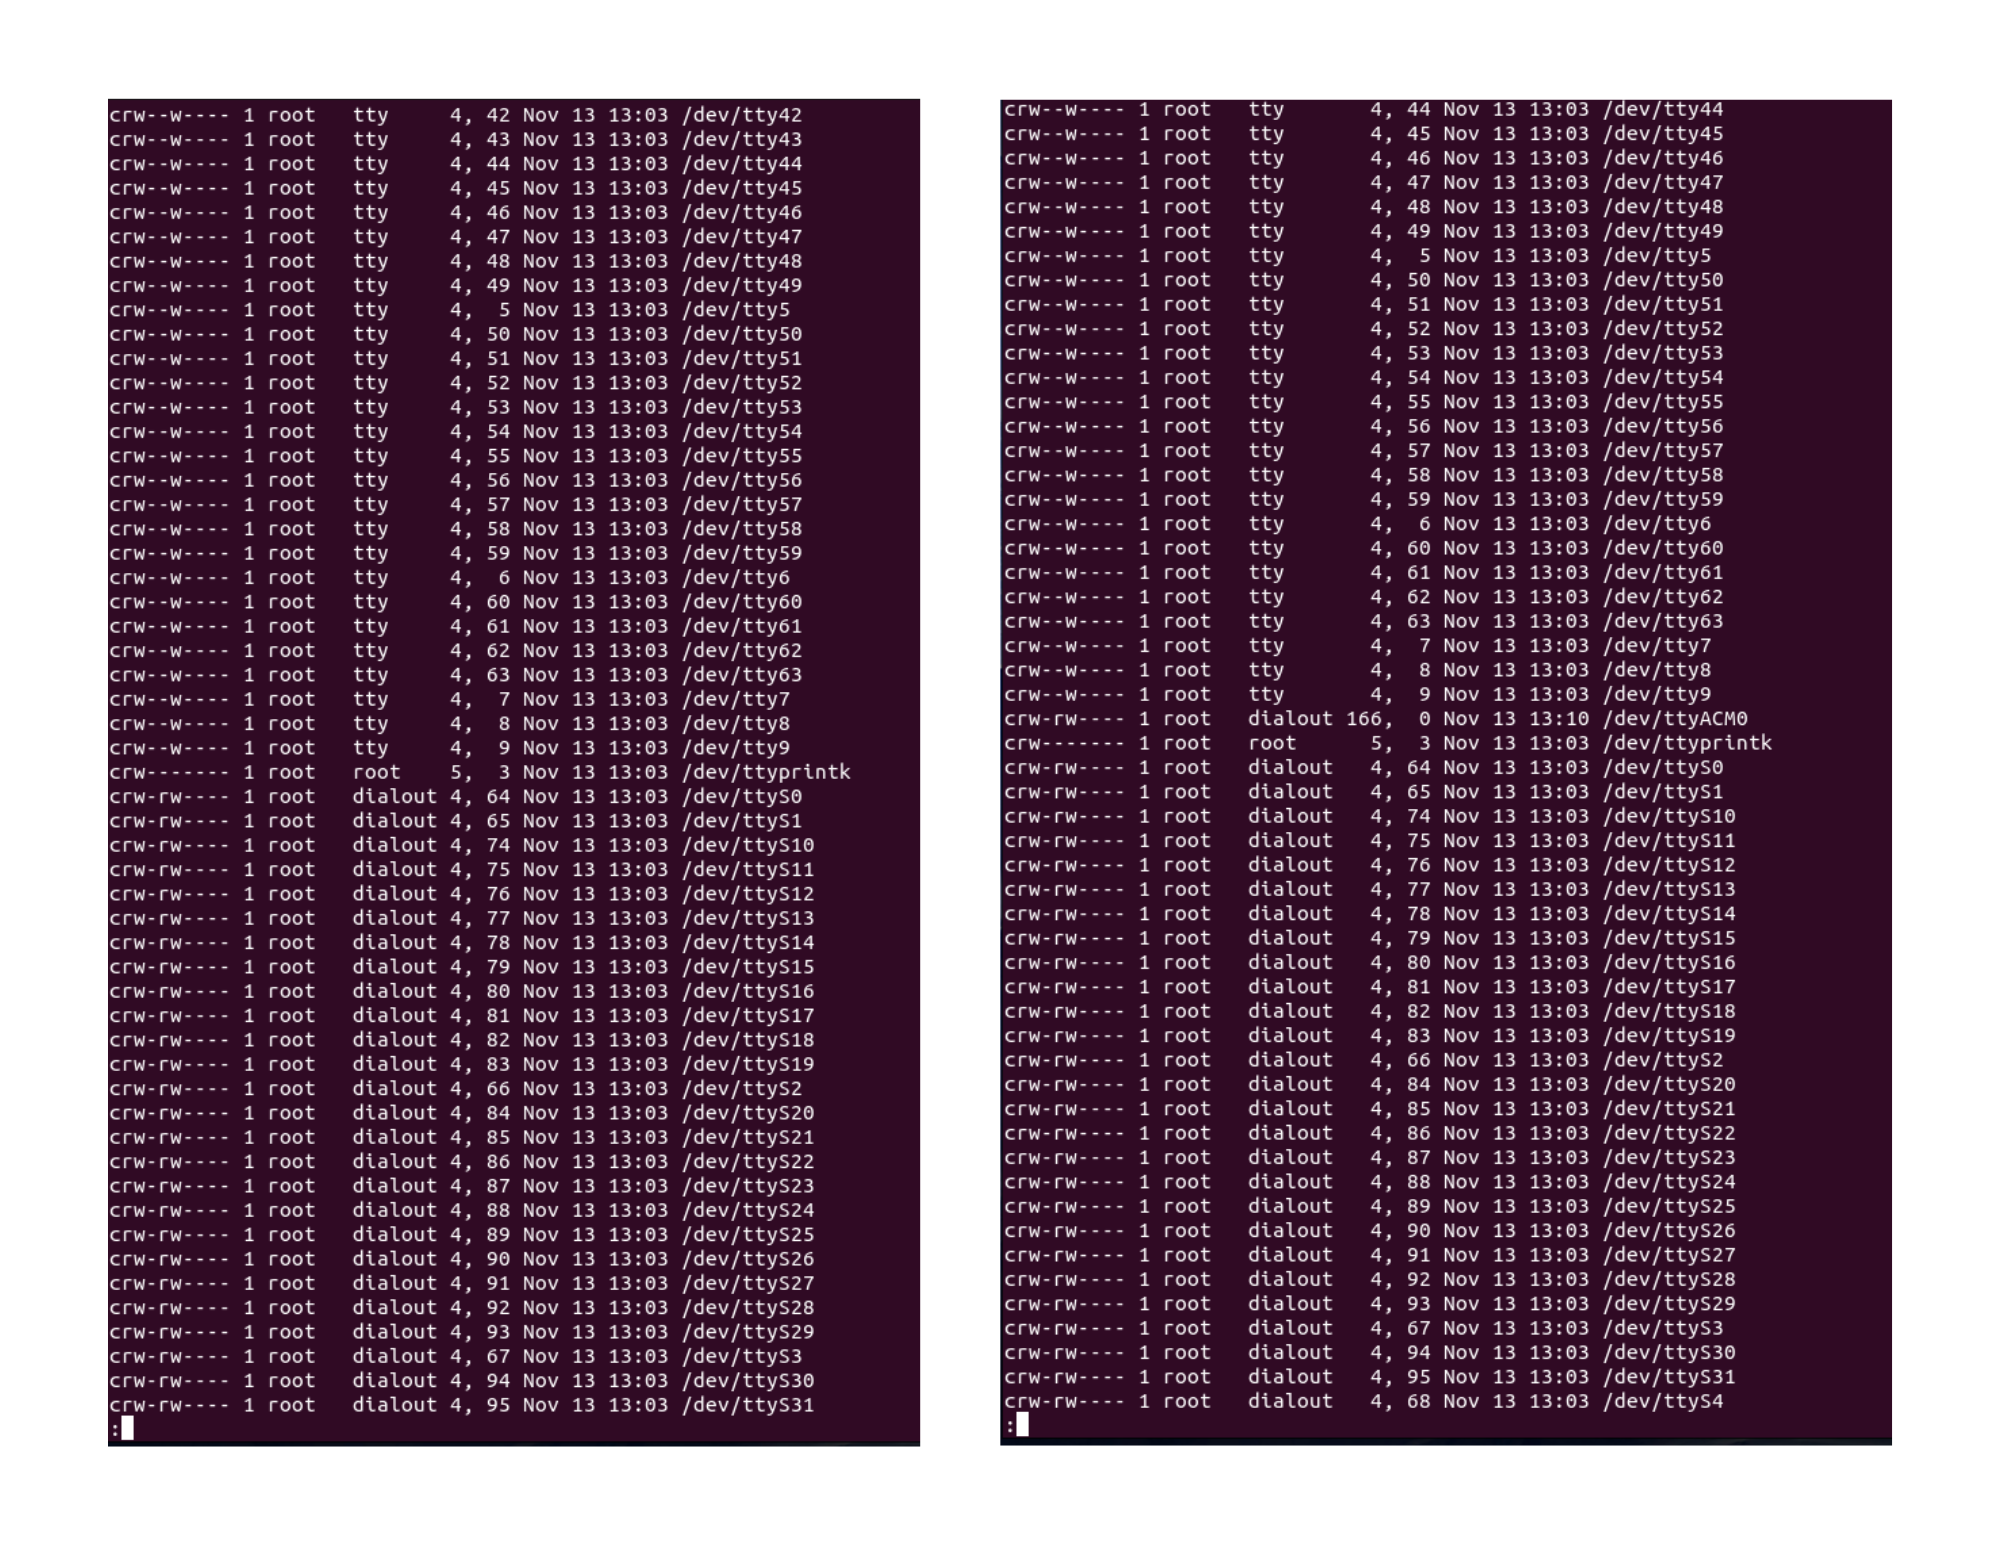
ls -l /dev/tty*Take note of the devices; if you have a ridiculous number and it fills more than a screen, we can pipe in another command that will allow you to pause the screen and scroll through your devices using the arrow keys. When you're finished, simply press the letter "Q."
ls /dev | grep tty | less
     or
ls -l /dev/tty* | less
Now connect the USB device and execute that command again; you should see a new interface, perhaps like /dev/ttyACM0 or /dev/ttyUSB0. Another command we can use, however it rarely works for me, is;
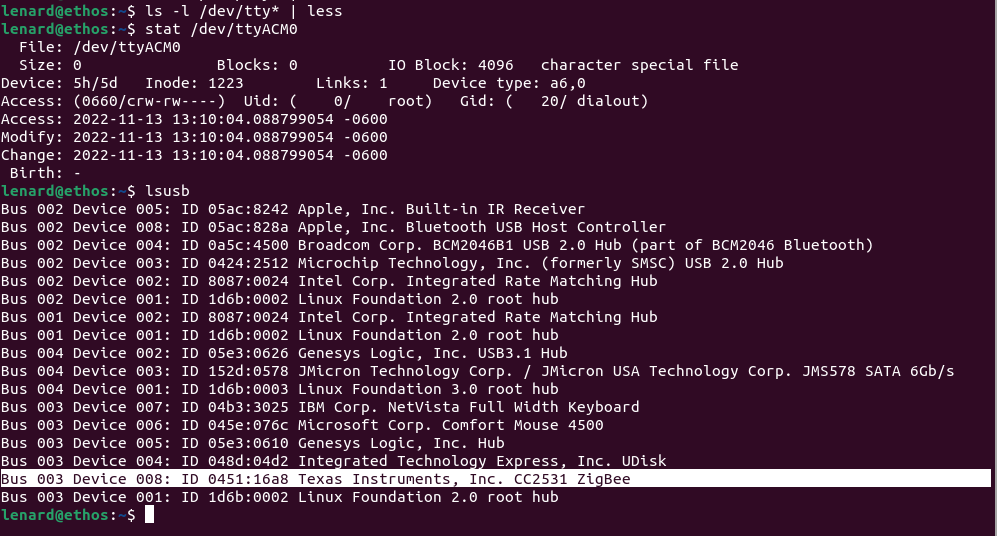
ls -l /dev/serial/by-idand other commands you can run are;
stat /dev/ttyAMC0
     or
lsusb
This is what my RPi looked like after I ran the command; you can see a before and after, and as I indicated, the devices are normally /dev/ttyACM0 or /dev/ttyUSB0, and the number at the end does not always have to be zero.
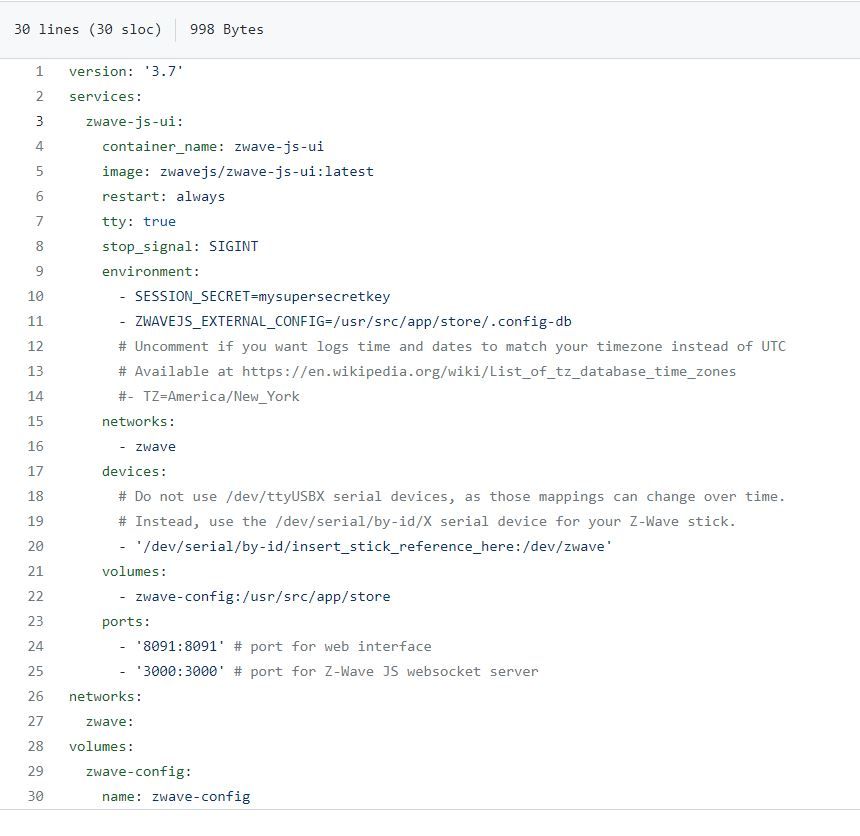
Now that we have this ID, we can make some adjustments to our YAML file, which is specified in both the Z-Wave and ZHA (ZigBee) documentation, which can be found here > ZigBee and here > Z-Wave
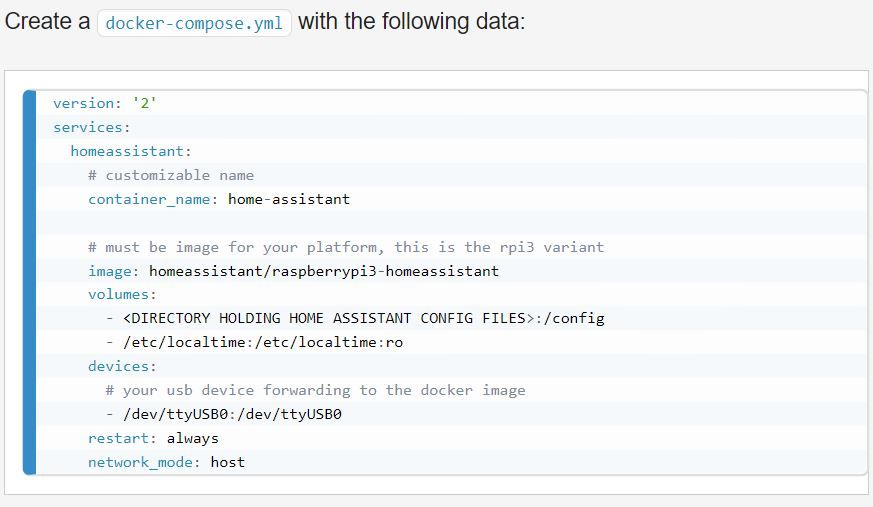
For ZigBee the instruction is:
devices:
  # your usb device forwarding to the docker image
  - /dev/<tty port name>:/dev/<tty port name>
For Z-Wave the instruction is:
devices:
      # Do not use /dev/ttyUSBX serial devices, as those mappings can change over time.
      # Instead, use the /dev/serial/by-id/X serial device for your Z-Wave stick.
      - '/dev/serial/by-id/insert_stick_reference_here:/dev/zwave'
The Z-Wave instructions mention not using the format /dev/ttyUSBX because the mapping can change; this may be true, but I've never had this happen to me. Simply replace the tty port name> in the examples above with the port you saw in the terminal output.
All you need to do now is restart or re-pull the container because you've made modifications, and this is the only way for Docker to recognize this.
If you are in the folder containing your YAML file, simply run the command;
docker-compose up -d The -d flag simply indicates to execute docker-compose detached from the terminal or in the background so you can quit the terminal when you're done and it won't effect your container. If you're using a GUI like Portainer or Yacht, simply navigate to the container and click the restart feature.
This is a companion post to the video I did about Docker, which can be found here:
Binary Tech Labs
YouTube content creator that provides tech tutorials and reviews on Home Assistant, IoT devices, Raspberry Pi and other Single Board Computers