MQTT Install As Home Assistant Add-On Or Self Hosted!
How do you install an MQTT Broker? This blog post will also show you how to use Docker to self-host, as well as the Home Assistant add-on. I'll also go through a testing tool that I use to test my configurations in a variety of environments.
Background
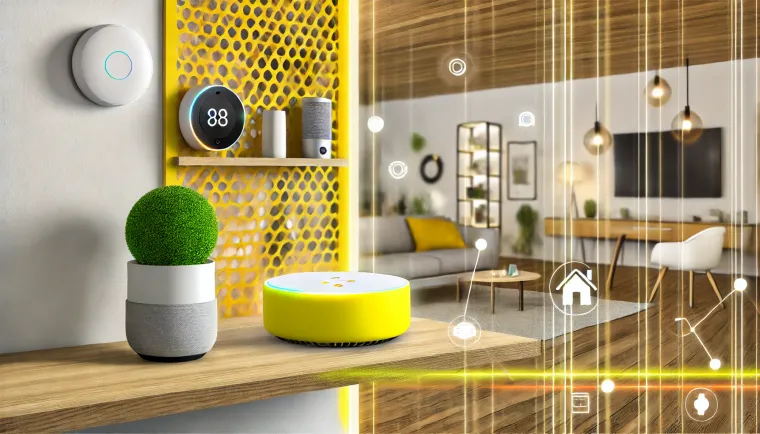
MQTT (aka MQ Telemetry Transport) is a TCP/IP-based machine-to-machine or "Internet of Things" connectivity protocol. It enables ultra lightweight messaging transport that is ideal for connecting remote devices with a small code footprint and minimal network bandwidth.
This protocol is event-driven, and MQTT clients can either publish or subscribe via Topics, which are decoupled from one another. The MQTT broker controls the connection between them, screening and delivering all incoming messages to the appropriate subscriber. These MQTT clients may be incorporated in the software you deploy, removing the need for further installation, and MQTT can be protected using SSL to assure privacy.
MQTT topics, wildcards, and best practices will be covered in this tutorial. With MQTT, a topic is a UTF-8 string that the broker uses to filter messages for each client. The topics consist of one or more topic levels separated by a forward slash known as a topic level separator. A client can subscribe to a topic by specifying the exact topic of a published message or by using wildcards to subscribe to many topics at the same time. A wildcard is only used for subscribing to topics, not for publishing messages. There are two kinds of wildcards: single-level and multi-level.
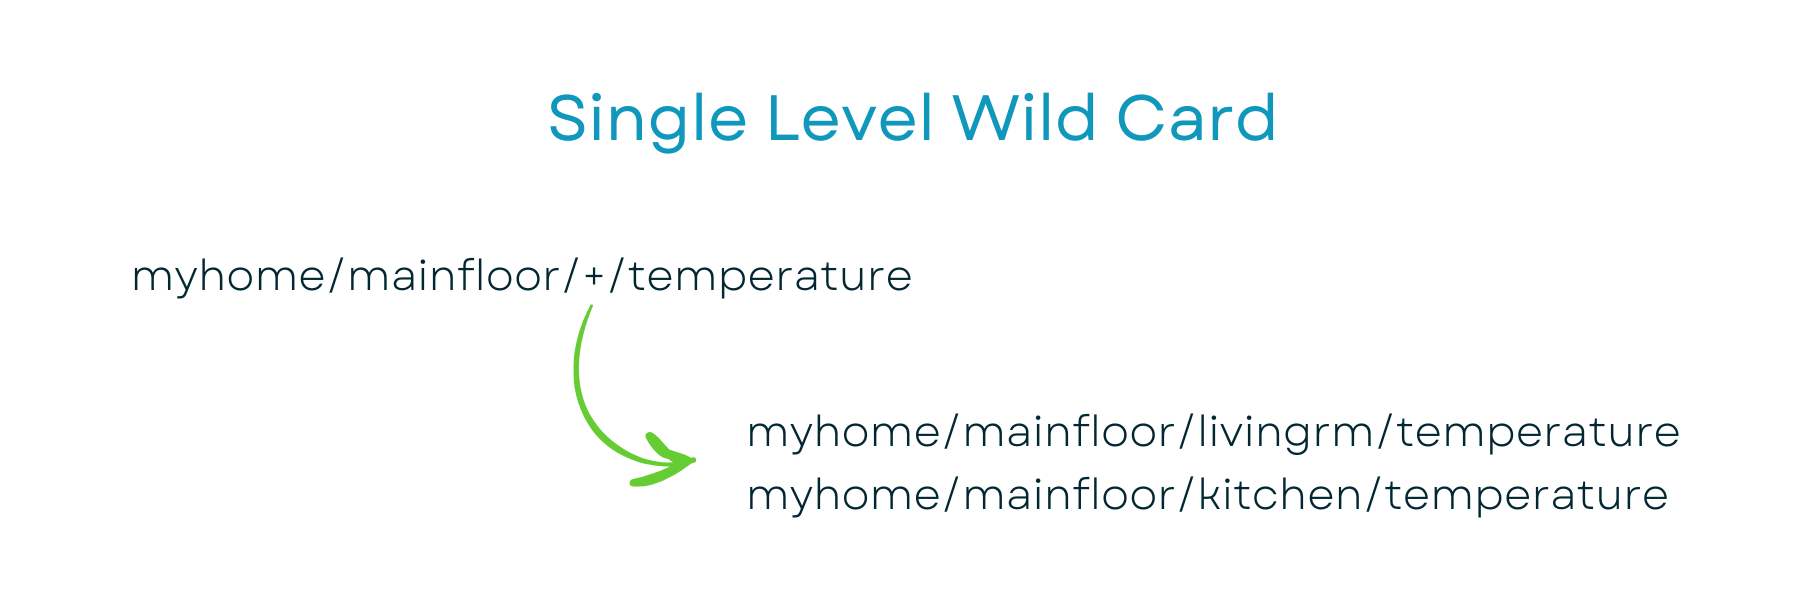
A single-level wildcard, as the name implies, substitutes one topic level. In a topic, the + symbol denotes a single-level wildcard. The topic level topic can contain any arbitrary string instead of the wildcard and it will match the topic with a single-level wildcard. A subscription to myhome/mainfloor/+/temperature, for example, will match the following results:
The multi-level wildcard covers a wide range of topic levels. The # symbol denotes the topic's multi-level wild card. The multi-level wildcard must be positioned as the final character in the topic which is preceded by a forward slash for the broker to identify which topics match. A subscription to myhome/mainfloor/#, for example, will match the following results:

In general, you could name your MQTT topics whatever you like, however there is one exception: topics beginning with a $ symbol have a different purpose. The $ symbol topics are designated for MQTT broker internal statistics.
Finally, let's go through some MQTT best practices.
A leading forward slash should never be used.
- MQTT allows for a leading forward slash. /myhome/mainfloor/livingroom, for example. The leading forward slash, creates an extra topic level with a zero character at the front. The zero serves no use and frequently causes misinterpretations and leads to mistakes.
In a topic, never use spaces.
- Every programmer's inherent nemesis is the space character. When things aren't working as expected, spaces make it difficult to read and debug topics. As with leading forward slashes, just because something is permitted does not imply that it should be utilized.
Keep the MQTT topic brief and to the point.
- Each topic is included in every message that uses it. Make your topics as brief and to-the-point as practical. Every bit counts on small devices, and topic length can have a huge impact.
Avoid non-printable characters by using just ASCII characters.
- Because non-ASCII UTF-8 characters frequently display erroneously, it is difficult to identify errors or character set incompatibilities. I suggest avoiding the use of any non-ASCII characters in a topic unless absolutely required.
Insert unique identifiers, such as the Client Id, into topics.
- It could be extremely beneficial to include the publishing client's unique identity in the topic. The topic's unique identifier assists us in determining who sent the message. Authorization can be enforced via the embedded ID. Only clients with the same client ID as the topic ID are permitted to publish to that topic.
Don't subscribe to only #
- It is occasionally required to subscribe to all messages sent over the broker. For example, you may want all messages saved to a database for troubleshooting purposes. However outside of this do not use an MQTT client with a multi-level wildcard to subscribe to all messages on a broker. Frequently, the subscribing client is unable to process the influx of messages caused by this approach.
Naming Convention
- Because MQTT topics are case sensitive, it is critical to follow a consistent set of naming standards when creating topics. As a result, when establishing your topics, you should only use lowercase characters, digits, and dashes.
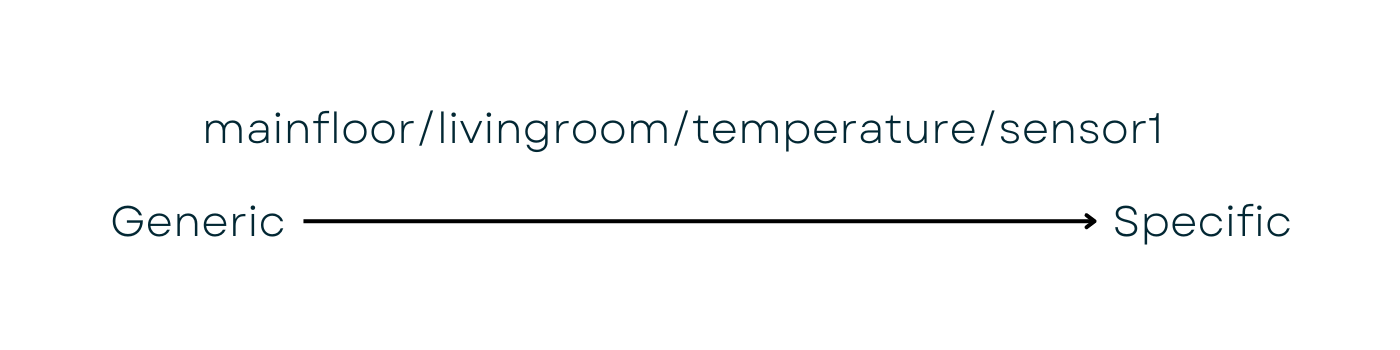
- The topic levels I've found are best to go from general to specific as the topic scheme flows from left to right.
- For example, if you had multiple temperature sensors you could have a topic level of main floor located in the living room and has a name of temp 1. The topic structure starts with the broad category, in this example the name of the floor, and concludes with the most specific identity, the sensor's name. This example generates the topic level structure shown below:
Self Hosted MQTT
You have a few options when it comes to self-hosting a MQTT broker: you can run it natively on your PC or server, or you can run it in a Linux container, otherwise known as LXC or you can use a docker container. I prefer the LXC container for a few reasons, they don't not include operating system images, they use fewer system resources than conventional or hardware-based virtual machine environments, which reduces overhead and I could go on and on as to my reasons, but you can do some research and decide for yourself.
There are various brokers available, but I like the Mosquitto Broker and utilize an LXC provided by GitHub account tteckster, which you can find here. If you want to run it natively on your PC or server you can use this guide here. You can also use the official docker-hub image which can be started on the command line, or using docker-compose, or through a GUI tool like Portainer or Yacht, which is a good way to get started, but I encourage you to invest the time in understanding Docker from the command line.
Okay, I've done some of the legwork for you, and I've included a link to my GitHub repository, if you are planning on using docker. You will find the docker-compose.yaml and mosquitto.conf files, as well as a reduced version, in there. As always, I cannot emphasize enough how important it is to consider security and your personal level of comfort. I highly advise you to enable authentication. To do so, navigate to your Mosquitto container in Portainer and click on the console link if you're running it that way, or use the docker exec command to launch a Bash terminal for the container, which allows you to perform certain Mosquitto-specific commands.
The command we will be using is as follows;
mosquitto_passwd -c /mosquitto/config/password.txt MQTT-UserThe -c flag in this command will allow us to create a new user in the /mosquitto/config/password.txt file with a username of MQTT-User. Keep in mind that the user name and password is case sensitive. It will now prompt you to enter a password and then once again to confirm it. You may skip this step by hitting enter twice and leaving it blank if you are not planning on securing your MQTT broker, again which I strongly advise against.
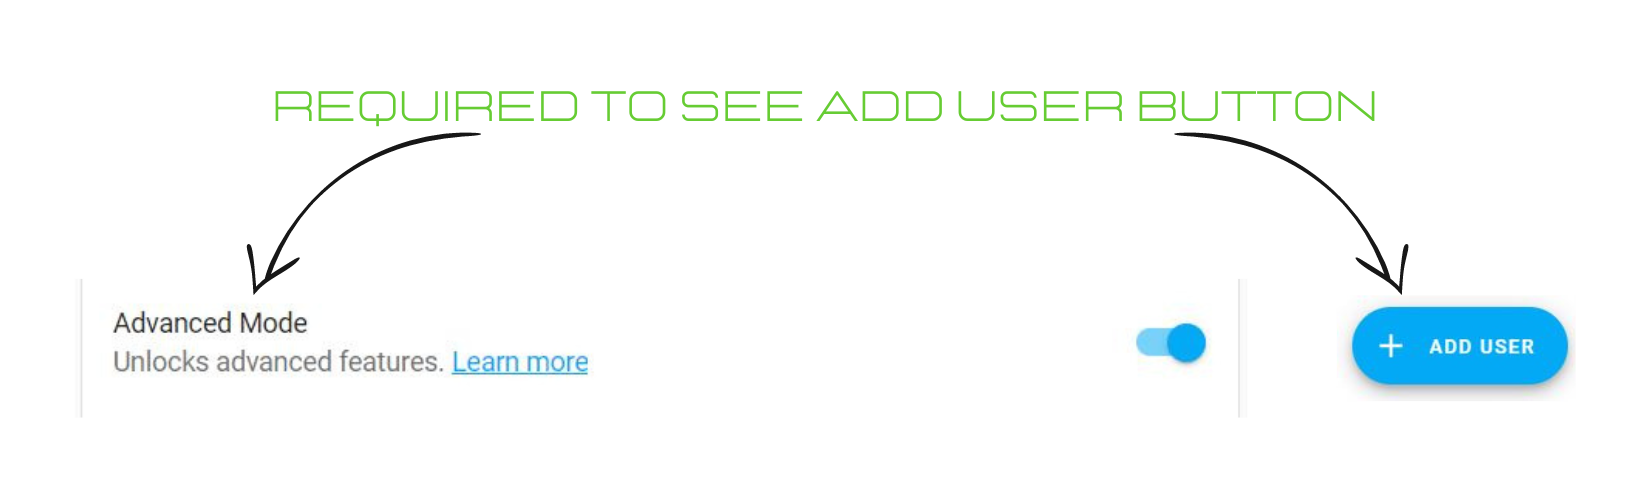
To add a new Home Assistant user, go back to Settings > People > and then the users tab at the top. If you don't see an add user button at the bottom right of your screen, you must enable advanced mode. To do so, click your user name in the bottom left, then scroll down and enable advanced mode. Now return back and you will see the add user button. Except for "homeassistant and addons," which are reserved names, you can name your user whatever you like. Unlike the password I'll use in this demo, I generally just call the user MQTT-User and give it a solid strong password.
Now check that the mosquitto.conf file indicates whether you are allowing anonymous connections or not, and that it is in the correct location. If you make modifications, you must restart the container for them to take effect. Also, depending on where your Docker folders are located, you may need to assume ownership of all files in that directory. You can complete this by running the command;
sudo chown -R $USER <directory>This will substitute your current logged in user in place of $USER and change the <directory> with the location of your Docker configuration files and the -R means recursive, which changes ownership of all downstream folders in that directory to your current user as well.
Navigate to the Settings menu in Home Assistant, then to the Integrations page. If Home Assistant does not already recognize the MQTT broker, we will look for it by clicking the Add Integration option at the bottom right.
The Broker IP address will just be your server's IP address, and the port will be 1883, which is the default. Simply enter the username and password you established in the previous step. Finally, click submit to get a success message! That's all; it's installed and should be operational, but we'll test it later using a tool I'll show you at the end.
Native Home Assistant MQTT Install
This section only applies to those who want to utilize the native home assistant add-on. The first step is to navigate to Settings > Add-ons > then click the add-on store in the bottom right corner. In the search bar, type MQTT, and then click on Mosquitto in the Official add-ons area. It will take you to the installation page, where you can view some documentation, which you should read and familiarize yourself with before clicking the install button. Before you click start when it is finished, there are a few configuration choices you should look over and adjust.
We won't be writing anything in the logins section of the setup tab at the top because we will create a new MQTT user in Home Assistant, which is allowed by default to utilize the integration. To add a new user, go back to Settings > People > and then the users tab at the top. If you don't see an add user button at the bottom right of your screen, you must enable advanced mode. To do so, click your user name in the bottom left, then scroll down and enable advanced mode. Now return back and you will see the add user button.
Except for "homeassistant and addons," which are reserved names, you can name your user whatever you like. Unlike the password I'll use in this demo, I generally just call the user MQTT-User and give it a solid strong password. Ok, on to security and encryption. Depending on your level of comfort, you will want to enable this, but you will need to generate some files and upload them to your Home Assistant instance, which is beyond the scope of this video. However, here are a few links if you choose to go down this rabbit hole. OpenSSL SUSE and IBM.
Moving on, based on how you configured the above, your configuration here will differ slightly, and however you configured it should be acceptable. Now we just return to the info tab at the top and select our options, "start on boot, watchdog, and auto update" before clicking start.
We can monitor the status of the integration by selecting the log tab at the top and regularly clicking the refresh button to ensure it starts up without issues. We can now add it to Home Assistant now that it has launched without any faults.
If we go to Settings > Devices and Services, we should find that it has already been identified by Home Assistant; if not, no worries, we can manually add it. Simply click Add Integration in the bottom right corner, search for MQTT, pick it twice to install the broker, the IP address is just your Home Assistant IP and unless you changed the port number you can leave it as it is. Then tick the option to allow MQTT discovery if desired, before hitting submit.
MQTT Explorer
MQTT Explorer is an all-in-one client that provides a structured overview of your MQTT topics and makes interacting with devices/services on your broker a breeze. It is intended to investigate, display, and sort statistics in MQTT topics in your IoT environment. It is handy if you want to evaluate how much and what type of information flows from publishers to the specified topic; but, unlike commercial MQTT brokers, which include detailed global data in the $SYS topic, but lack per-topic statistics. You can see a lot of per-topic statistics and also investigate what's going on in real time.
It was created by Thomas Nordquist, and is a fantastic piece of software that is accessible for Windows, Mac, and Linux. Here is a link to this awesome software, so let's take a look at this software. The first thing we want to do is provide our connection details by clicking on the + sign, and then we can enter our MQTT information and on the advanced section if you have chosen to employ encryption. Use the IP address of your server, which is your Home Assistant IP if using the Native Home Assistant MQTT, or the internal IP of that container running MQTT in the Docker container version, and finally, in the case of an LXC virtualized container, it will have an IP address that you set or that your router has assigned to it. Now, simply click submit and take a look around. Experiment with it.
We can send a payload through Home Assistant by going to Settings > Devices and Services > then clicking configure under the MQTT integration and entering a topic and payload and then clicking publish, and we can see it come into MQTT explorer. We can also send information back to Home Assistant through MQTT explorer by setting the topic to listen to and clicking "Start listening" in that same configure integration menu in Home Assistant and publishing from MQTT Explorer.
Binary Tech Labs
YouTube content creator that provides tech tutorials and reviews on Home Assistant, IoT devices, Raspberry Pi and other Single Board Computers